

HI friends, another article for those starting on the Nutanix journey! 👋
Ever felt like your IT infrastructure is bursting at the seams? Like a closet that just can’t hold any more clothes? Well, if you’re working with Nutanix, you’re in luck because scaling up your cluster is surprisingly easy! One of the coolest things about Nutanix is how effortlessly you can expand your system by simply adding a new “node.” Think of a node as a building block for your cluster—it brings more compute (CPU and memory) and storage to the party.
Today, we’re going to walk through the super simple process of adding a new node to your existing Nutanix cluster. It’s designed to be a smooth ride, even for those just starting out!
Step 1: The Physical Stuff – Racking and Cabling Your New Node 🔌

Before we dive into the software magic, we need to get our hands a little dirty (not really, it’s mostly just plugging things in!).
You’ll need to physically install your new Nutanix node into your server rack. This is usually a straightforward process, just like installing any other server. Make sure it’s secure and has proper airflow.
Next, it’s time for the cabling. This is crucial! You’ll need to connect:
- Power cables
- Network cables: Connect the node’s network ports to your switches. Ensure you’re plugging them into the correct network segments as your existing nodes. This is often where a new admin might get tripped up, so double-check your network plan!
That’s it for the hardware! Once it’s powered on and connected to the network, the new node will typically boot up and start looking for a Nutanix cluster to join.
Step 2: Logging into Prism Element – Your Control Center 🖥️

Now for the software part! Open your web browser and navigate to your Prism Element interface. This is your go-to dashboard for managing your Nutanix cluster.
You’ll log in with your administrator credentials. Once you’re in, you’ll see the main dashboard, which displays your cluster’s health and performance.
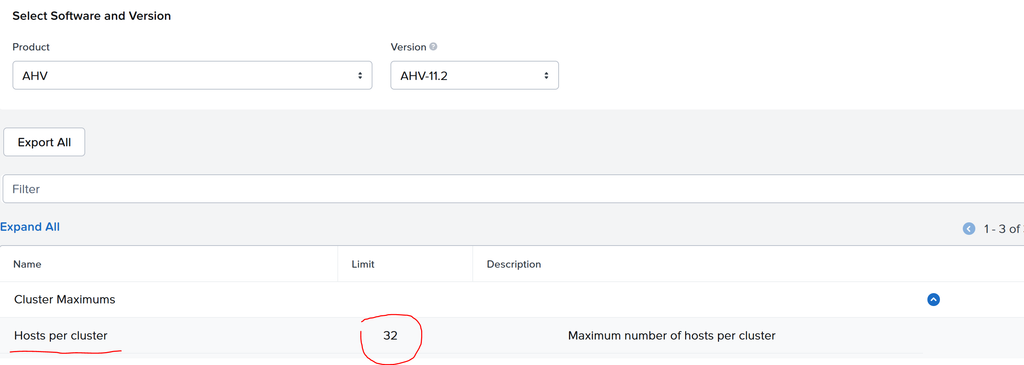
Check maximus Nutanix site:
Currently (as of the date of this publication), we can expand to a maximum of 32 nodes per Nutanix cluster.
Step 3: Discovering the New Kid on the Block (Node, that is!) 🕵️♂️
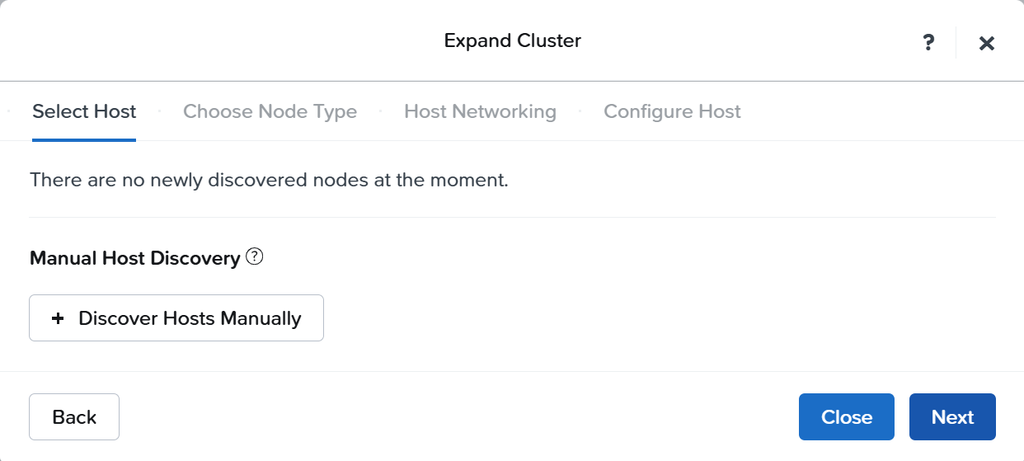
Nutanix is pretty smart. If your new node is properly connected and powered on, your existing cluster will usually automatically discover it!
You’ll typically find a notification or a task indicating that a new node has been discovered and is ready to be added. If not, you can usually navigate to the “Hardware” section (or similar, depending on your Nutanix version) in Prism Element.
Look for an option like “Expand Cluster” or “Add Node.” When you click on it, Prism Element will likely show you the newly discovered node, often identified by its serial number or IP address.
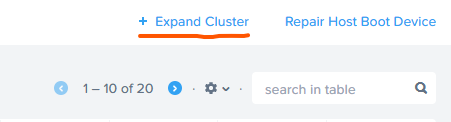
Step 4: Adding the Node to Your Cluster – The “One-Click” Magic
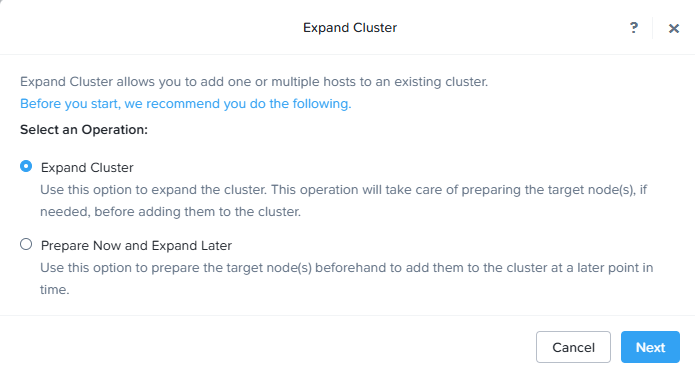
This is where Nutanix really shines! Once you’ve identified the new node, it’s often as simple as clicking an “Add Node” button.
Nutanix will then handle all the complex configuration behind the scenes:
- It will install the necessary software on the new node.
- It will integrate its storage into the existing storage pool.
- It will configure the new node to become a full, active member of your cluster.
This process might take a little while, so grab a coffee! You’ll usually see progress indicators within Prism Element.
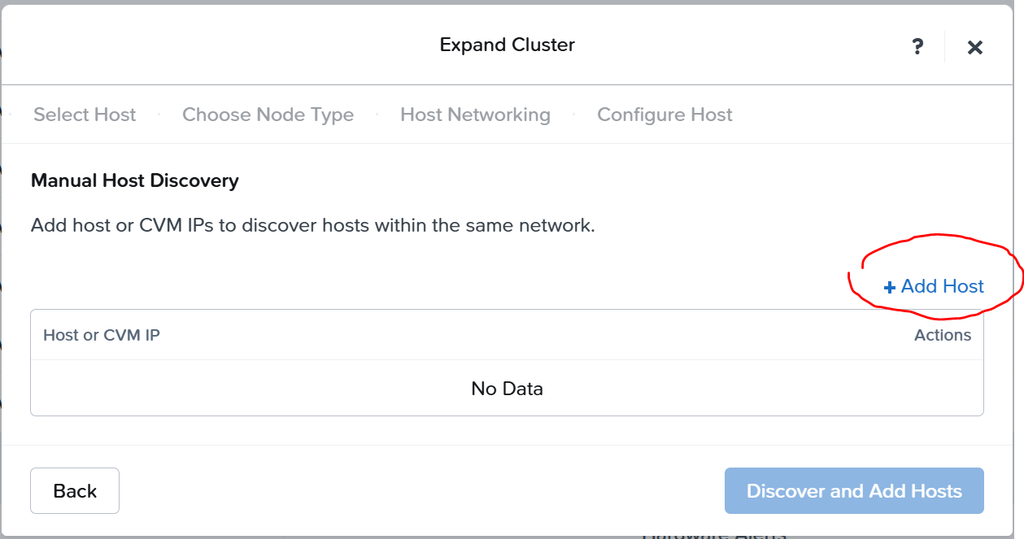
If the automatic search fails to find it, you can manually add the host to the expansion; however, it is highly recommended that you check your entire network configuration for connectivity issues, as the wizard normally detects isolated nodes.
Step 5: Verification – Confirming Your Expanded Cluster ✅
Once the process is complete, you should see your newly added node listed in the “Hardware” section of Prism Element. Your cluster’s overall capacity (both compute and storage) will also be updated to reflect the new resources.
That’s it! You’ve successfully scaled your Nutanix cluster by adding a new node. Pretty neat, right? This ease of expansion is a huge advantage for businesses that need to grow their infrastructure without complex and disruptive upgrades.